Installing a Windows Server with AD DS Role (Domain Controller)
Published on 11 min read
Updated on
In this series52 min read in total
- Installing a Windows Server with AD DS Role (Domain Controller)
- Active Directory multi-sites, network shares and user rights management
- Apply quota on network shared directories
A domain controller is not a product you install: it is an ordinary Windows server to which you add a role, and which you then promote. This lab starts from a freshly installed Windows Server and ends on a working SDE.LOCAL domain, ready to receive organizational units, groups and accounts.
Why the order of the steps matters
Three phases follow one another, and the order is not negotiable.
| Phase | What you do | Why now |
|---|---|---|
| 1 | Static IP address and machine name | Both values get written into the directory at promotion time |
| 2 | Install the AD DS role | Drops the binaries, creates nothing |
| 3 | Promote to domain controller | Creates the forest, the domain, the database and DNS |
The key point is that phase 3 carves in what phase 1 defined. A domain controller publishes its name and address in its own DNS records, and clients use those records to find it. Renaming the machine or changing its address afterwards is not a one-click fix: it requires dedicated procedures, or even demoting and re-promoting the server.
That dependency is exactly what dictates the first step.
Step 1: pin down the server’s network identity
A domain controller must be reachable at a predictable address, under a name that will never change again. So both get settled before anything is installed.
Open the network adapter list
Open the Run dialog with Win + R, type
ncpa.cpland confirm to jump straight to the network adapter list.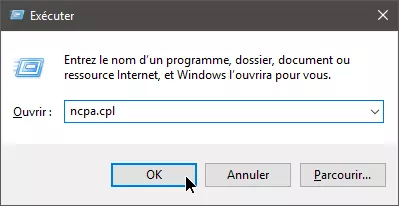
Open the IPv4 properties
Open the properties of the Ethernet adapter and double-click
Internet Protocol Version 4 (TCP/IPv4)to edit its settings.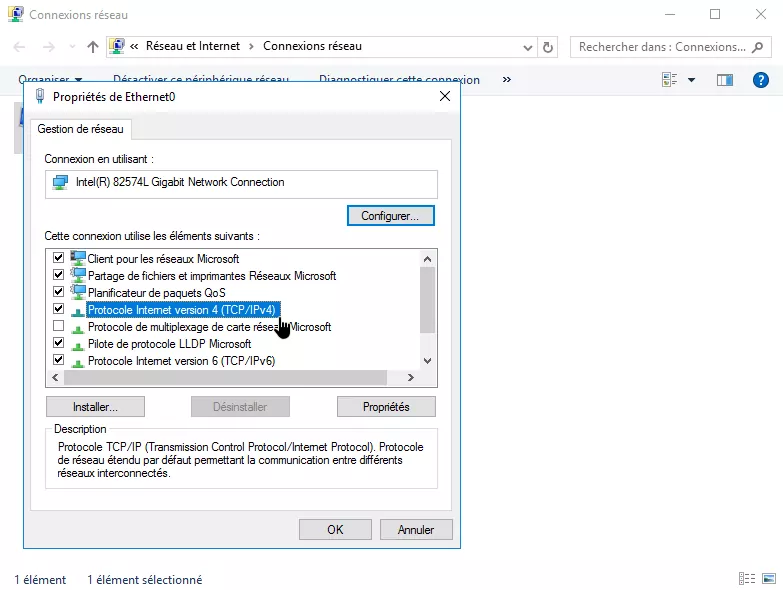
Switch to static addressing
Select the option to use a static configuration and enter the IP address, subnet mask and default gateway. Leave the DNS fields empty for now.
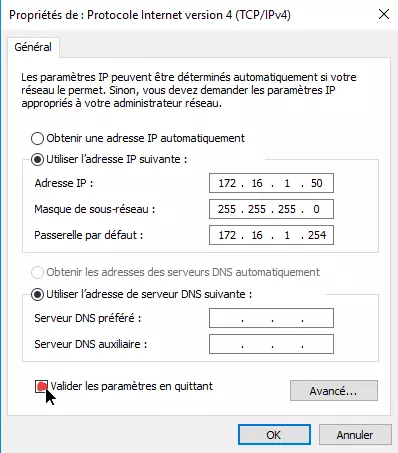
The values used in this lab:
Setting Value Role IP address 172.16.1.50the address clients will query Subnet mask 255.255.255.0delimits the server’s local network Default gateway 172.16.1.254exit towards other networks Preferred DNS server empty for now filled in automatically at promotion Locate the current machine name
Open Server Manager, select Local Server and locate the current computer name in the properties pane.
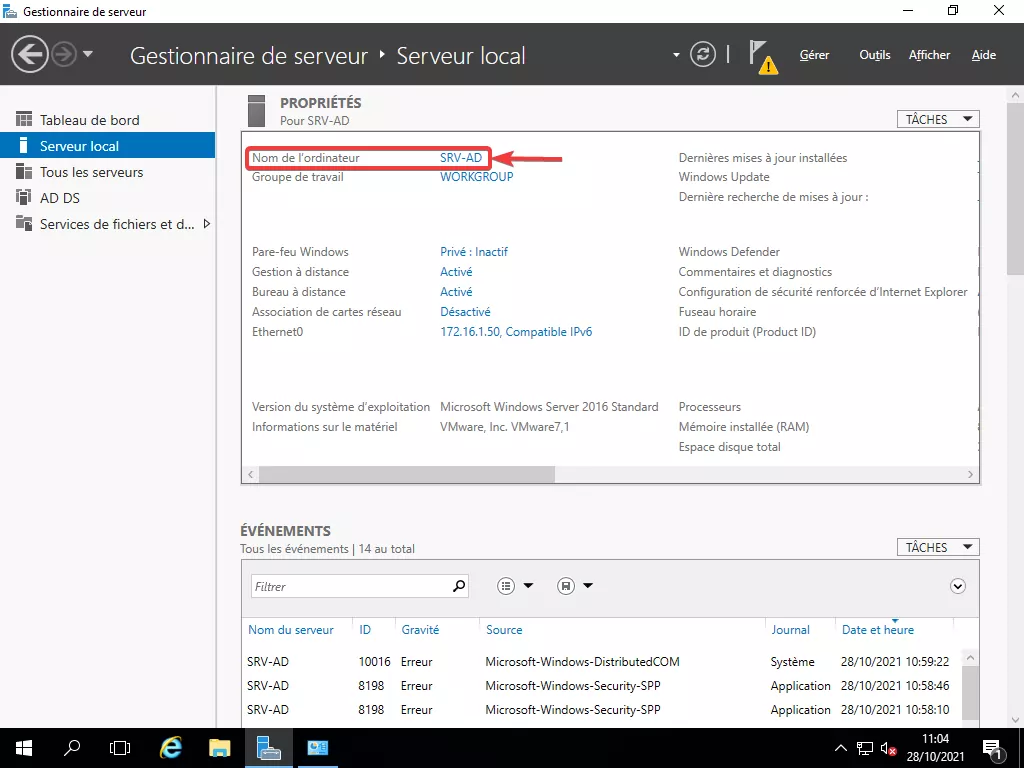
Open the rename dialog
Open the System Properties on the Computer Name tab and click
Change...to rename the server.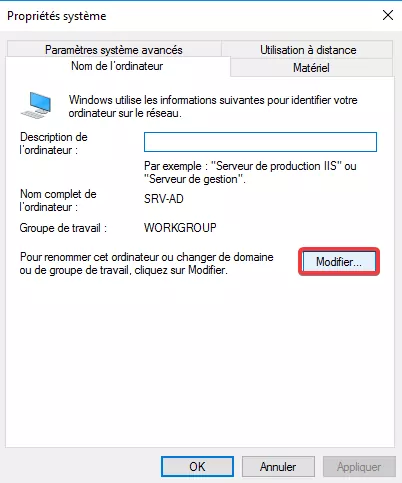
Name the server and restart
Type the new machine name (here
SRV-AD), confirm withOk, and restart when prompted so the change takes effect.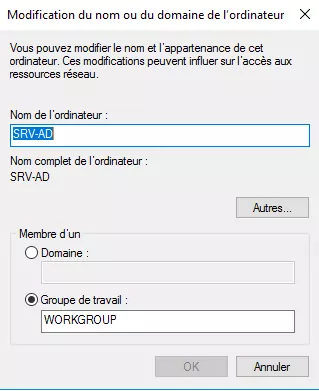
The server identity is stable. The role binaries can now be dropped in.
Step 2: install the AD DS role
This step creates nothing: it merely installs the required components. The domain will only exist after the next step. Microsoft separated the two on purpose, so a server can be prepared without committing a single change to the directory.
Launch the wizard
Launch the Add Roles and Features Wizard from Server Manager. The first page recaps the prerequisites, so read it and click
Next.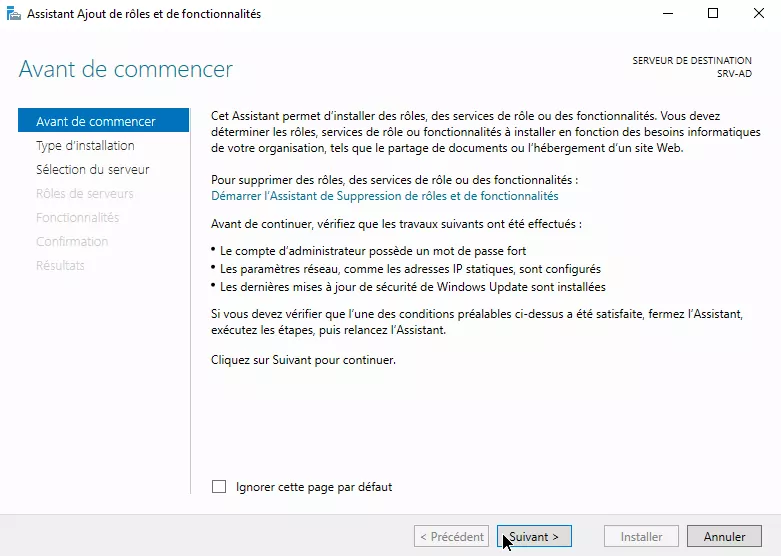
Choose the installation type
Keep the default
Role-based or feature-based installationoption and continue. The other choice, Remote Desktop Services installation, covers an entirely different scenario.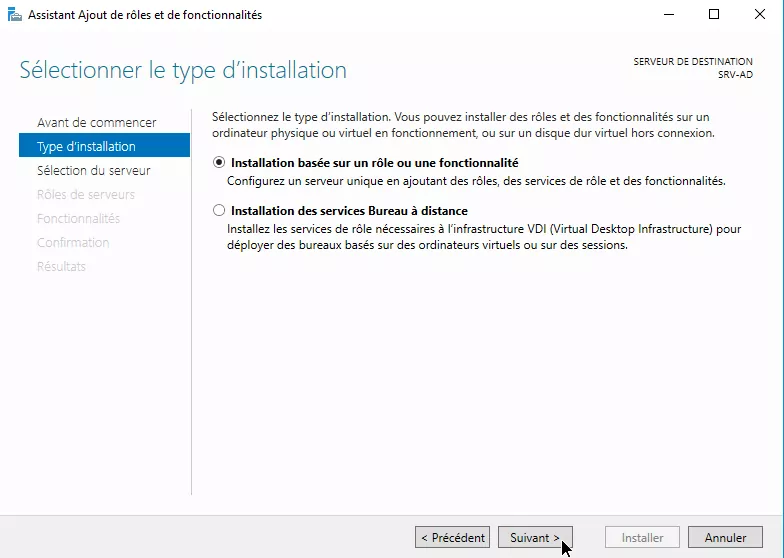
Select the destination server
Select the local server (
SRV-AD) from the server pool as the installation target and continue. The pool can hold several remotely managed machines, so check that the selected row really carries the name and address set in step 1.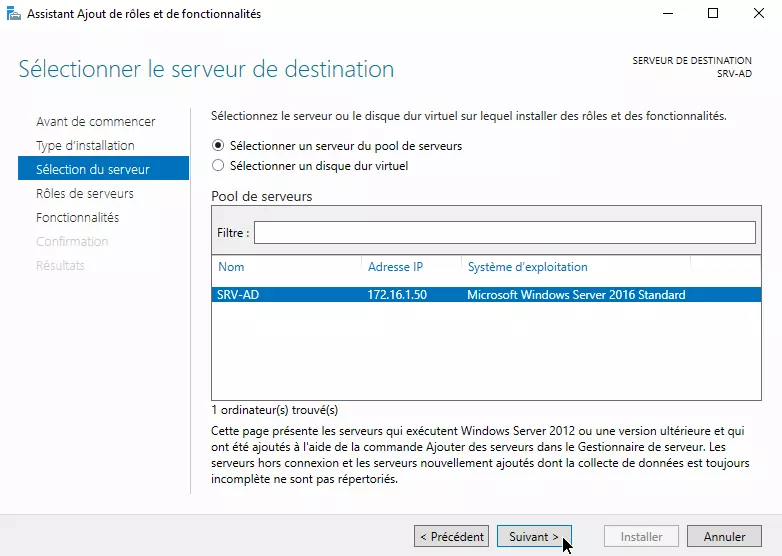
Tick the role then confirm
In the role list, tick
Active Directory Domain Services. The wizard immediately offers to add the matching management features, accept them: those are the consoles you will work with afterwards. Move on to the confirmation page and start the installation.
The binaries are in place, the server is waiting to be promoted.
Step 3: promote the server to domain controller
This is where everything gets created: the forest, the domain, the directory database, the DNS zone and the SYSVOL share. The wizard asks a series of questions, each of which locks in a lasting choice.
Start the promotion
Once the role is installed, open the notification flag in Server Manager and click
Promote this server to a domain controller.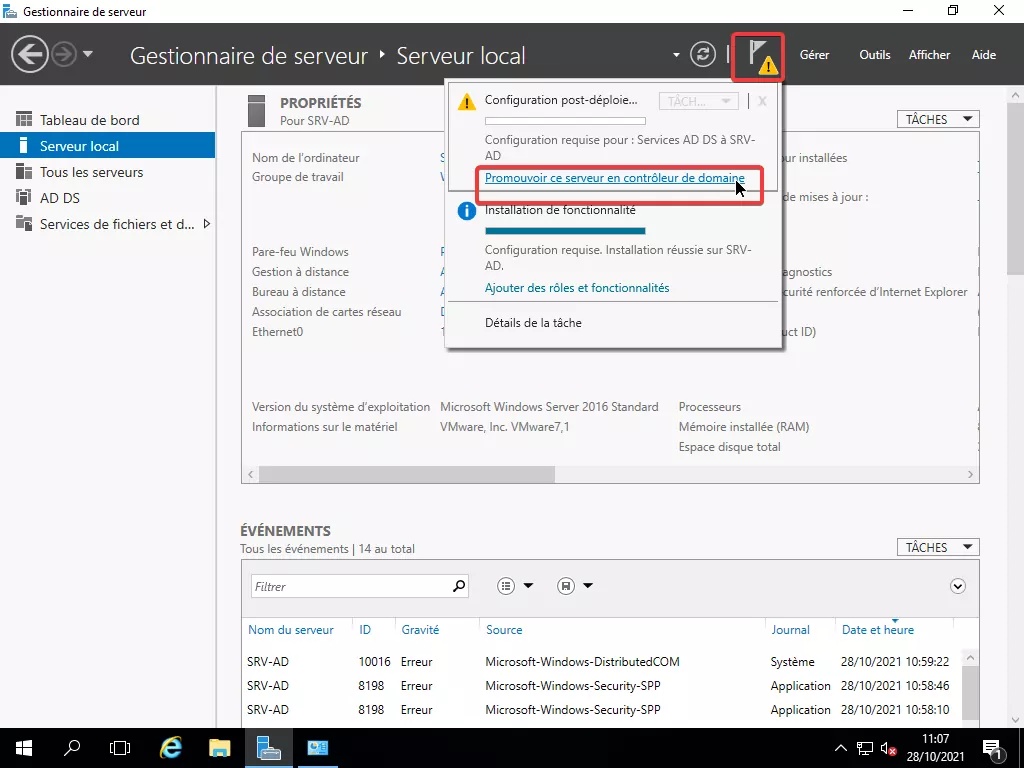
Create a new forest
In the deployment configuration, choose
Add a new forestand enter the root domain name, hereSDE.LOCAL.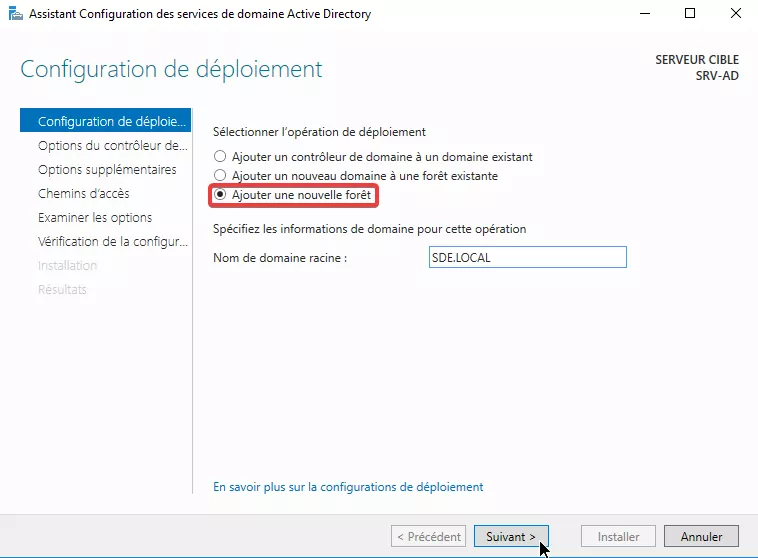
The three options match three distinct situations:
Option When to use it Add a new forest first domain controller, no existing directory: our case Add a new domain to an existing forest create a subsidiary under a directory already in place Add a domain controller to an existing domain add a second controller for redundancy Set the functional levels and the DSRM password
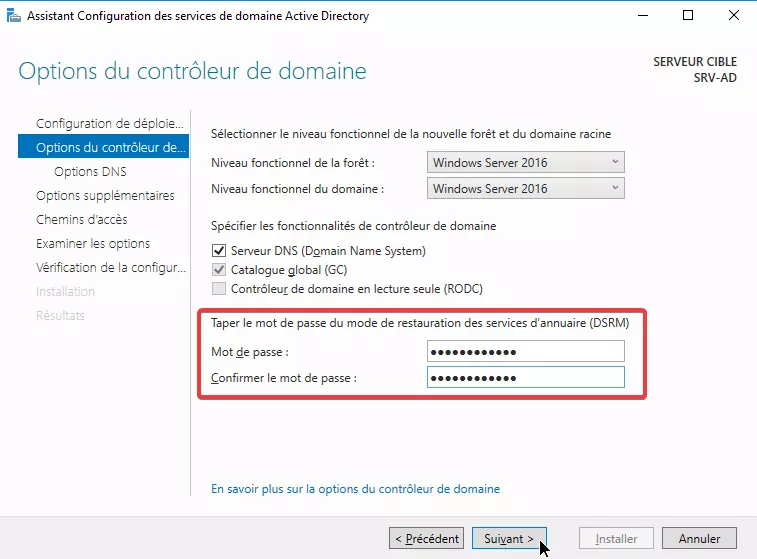
Set the forest and domain functional levels (here Windows Server 2016), keep the DNS server and global catalog options, and provide a Directory Services Restore Mode password.
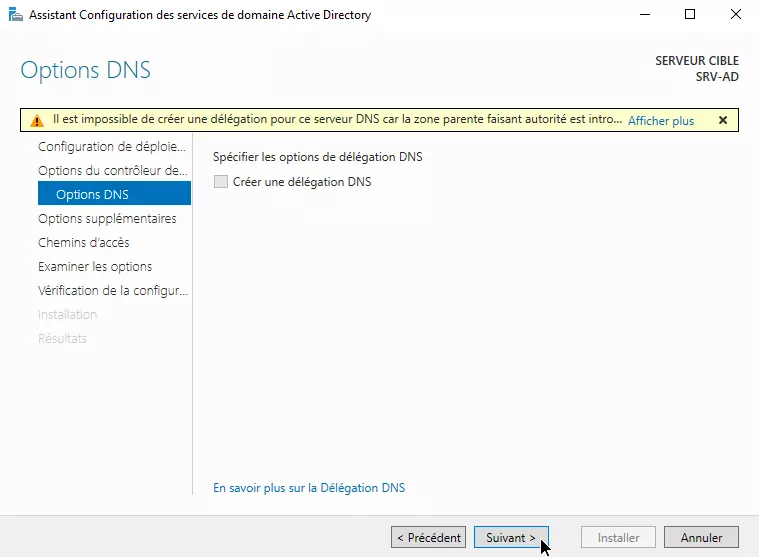
Ignore the DNS delegation warning
On the DNS Options page, the wizard warns that no DNS delegation can be created. Leave the delegation option unchecked and continue.
Check the NetBIOS name
Verify the NetBIOS domain name proposed by the wizard, here
SDE, and adjust it only if needed.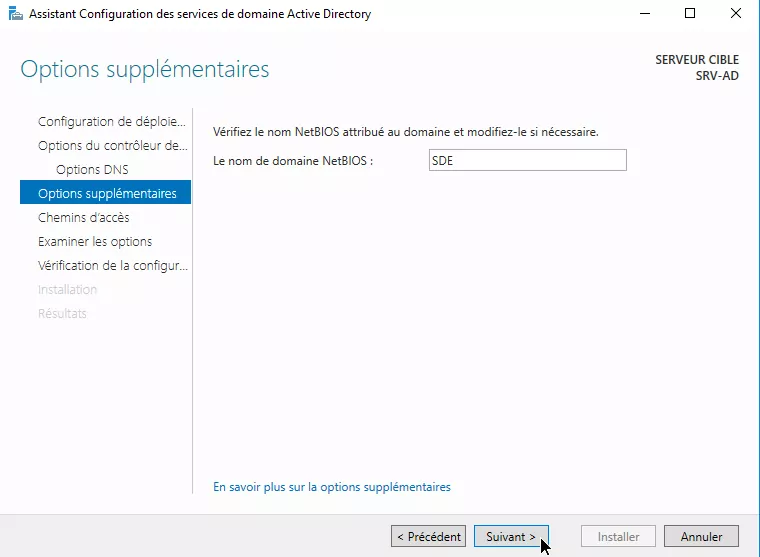
Keep the default paths
Keep the default locations for the AD DS database, log files and
SYSVOLfolder.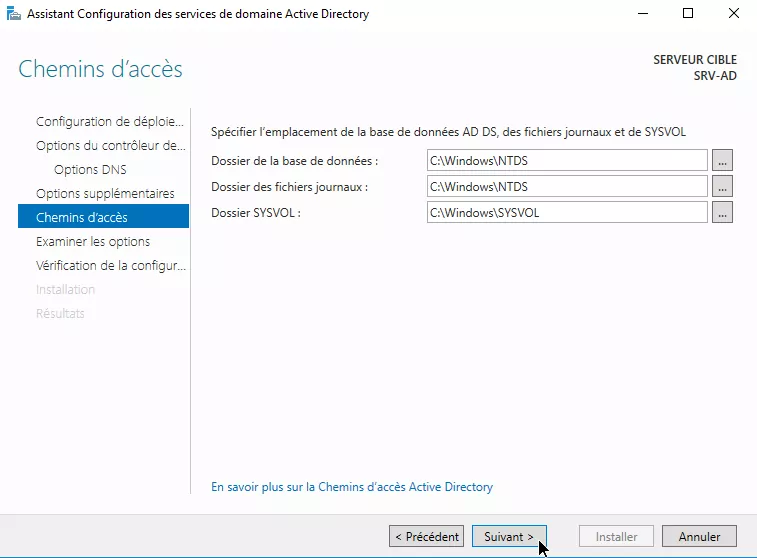
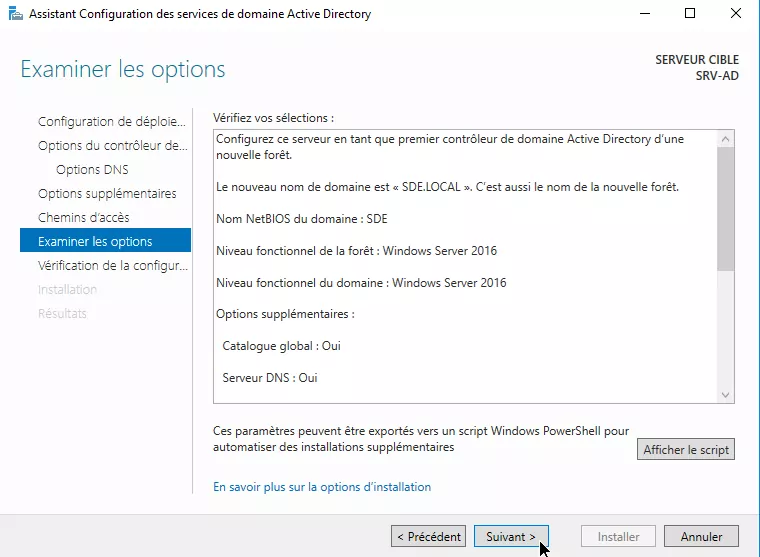
Review the summary
Review the summary of selections to confirm the new forest and domain settings before proceeding. This is the last screen before irreversible changes.
Start the installation
The wizard runs the prerequisites check. Once every item passes, click
Installto begin the promotion.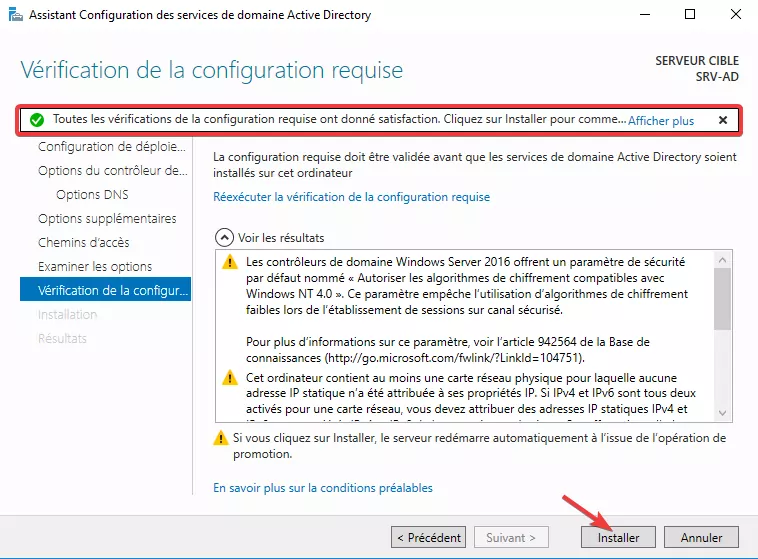
Let the server reboot
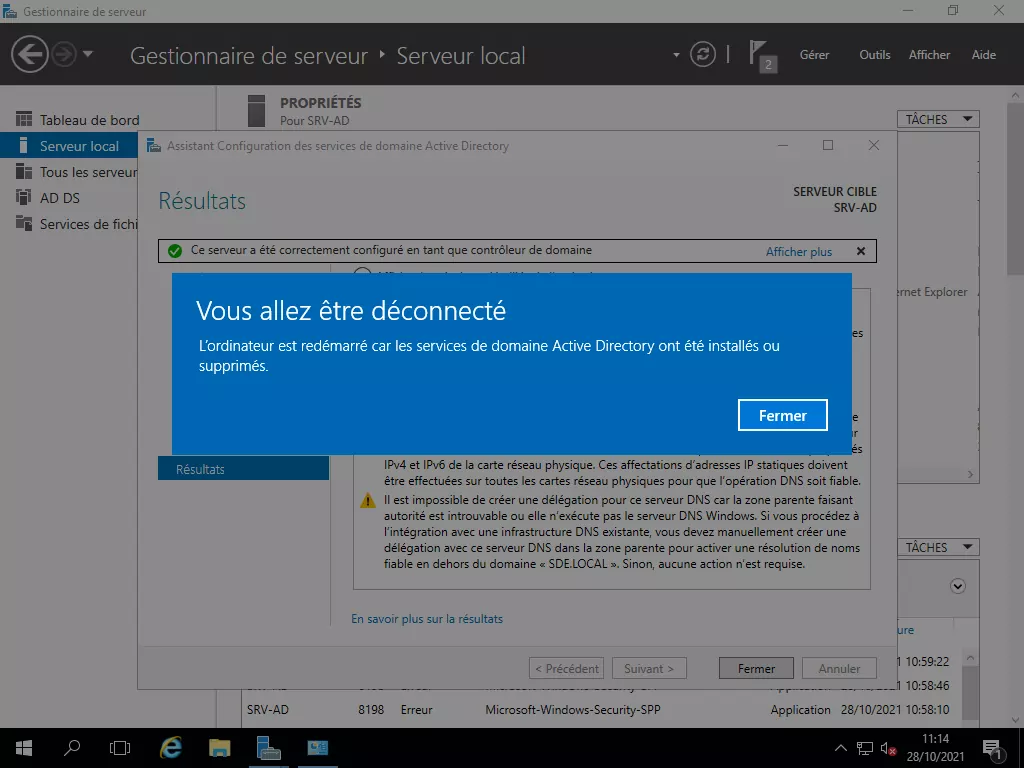
When the installation finishes, the server signs out and reboots automatically to complete the promotion.
Verify and carry on
After the reboot, the sign-in screen shows the domain account (SDE\Administrateur) instead of a local one: the server now belongs to the domain it hosts itself.
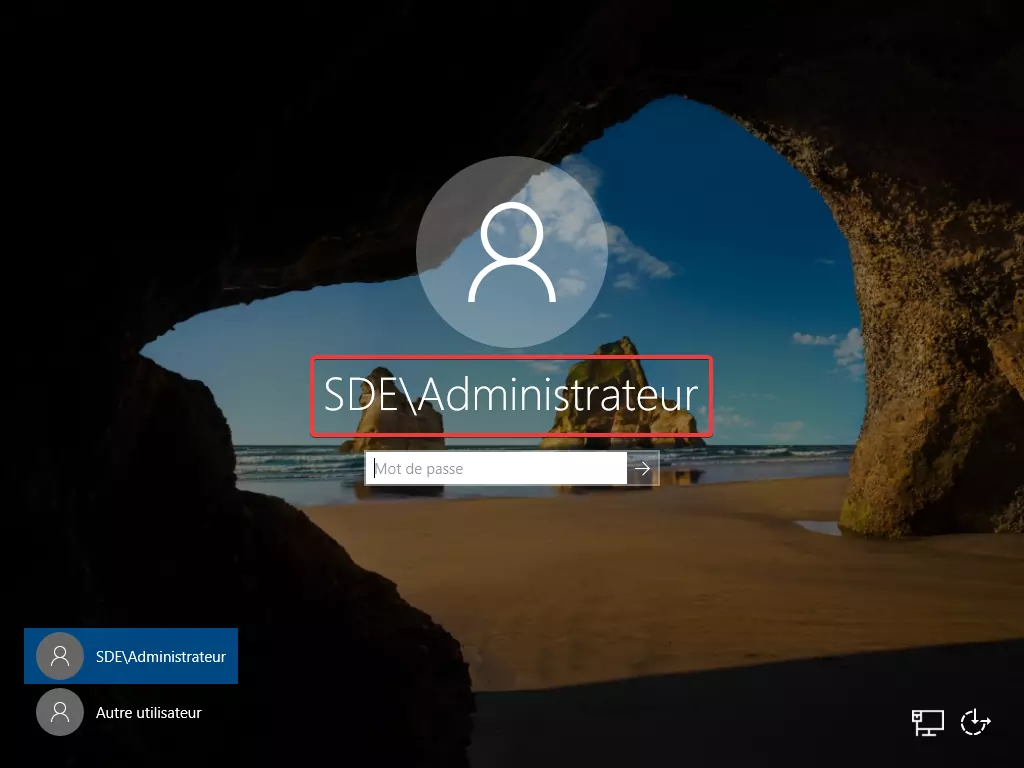
That is the first sign, but not proof enough. The four checks below confirm the promotion actually succeeded.
| To check | Command or console | Expected result |
|---|---|---|
| The server is its own DNS | ipconfig /all | DNS server at 127.0.0.1 or the server’s address |
| The domain resolves | nslookup sde.local | the controller’s address, here 172.16.1.50 |
| The service records exist | nltest /dsgetdc:sde.local | the controller is returned with its capabilities |
| The directory answers | dsa.msc | the Users and Computers console opens on SDE.LOCAL |
The SDE.LOCAL domain is up, but it is empty: no organizational unit, no group, no user. That is the subject of the next article in the series, which builds a complete organization on this controller and names it SRV-CHA in a three-site topology: Active Directory multi-sites, network shares and user rights management.