Apply quota on network shared directories
Published on 11 min read
Updated on
In this series52 min read in total
- Installing a Windows Server with AD DS Role (Domain Controller)
- Active Directory multi-sites, network shares and user rights management
- Apply quota on network shared directories
The previous lab answered the question “who reaches what”. One question remains, just as structural for a file server: “how much”. Nothing yet stops a single user from filling DATA-CHA on their own and blocking the whole site. That is what quotas are for, along with their natural complement, file screening.
The context: what quotas are there to solve
We pick up from the infrastructure built in Multi-site Active Directory, network shares and user rights management, and we work on the Chassignieu server.
The NTFS permissions set in the previous article decide access, never volume. A technician allowed on Tech-Common can drop 400 GB there with no rule standing in the way, and the other folders on the same volume will suffer for it. A quota therefore layers on top of the rights, it never replaces them.
Here are the limits the company asked for, folder by folder:
| Scope | Limit | Right mechanism |
|---|---|---|
DATA-CHA\Tech-Common | 1 GB | plain quota on the folder |
DATA-CHA\Adm-Common | 1 GB | plain quota on the folder |
DATA-CHA\Tech-Chassignieu | 2 GB | plain quota on the folder |
DATA-CHA\Adm-Chassignieu | 4 GB | plain quota on the folder |
DATA-CHA\Management | 4 GB | plain quota on the folder |
PROFILS-CHA, per user | 500 MB | auto quota on the parent folder |
DBASE-CHA, per user | 500 MB | auto quota on the parent folder |
The first five rows target a single folder shared by a whole department: one global limit is enough. The last two instead target one folder per user, created automatically by Active Directory at first logon. Setting 200 quotas by hand would be absurd and impossible to maintain: that is exactly the problem auto quotas solve, covered further down.
Those limits are not available in Windows Server out of the box: they come with a role.
Step 1: install the File Server Resource Manager role
The role is installed on the server physically hosting the shares, here SRV-CHA. It has nothing to do with Active Directory, so it will need installing on every file server, SRV-VIR and SRV-BLA included.
Launch the Add Roles wizard
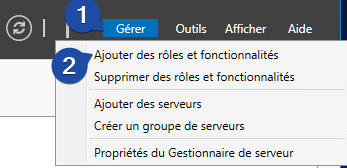
In Server Manager, open the Manage menu then select Add Roles and Features to launch the wizard.
Pass the prerequisites page
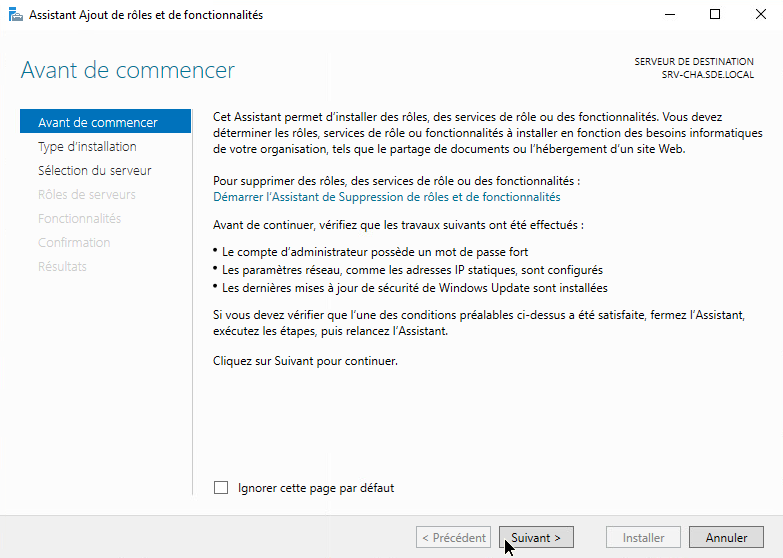
The wizard opens on the Before You Begin page, which recaps the prerequisites: read it, then click Next.
Choose the installation type
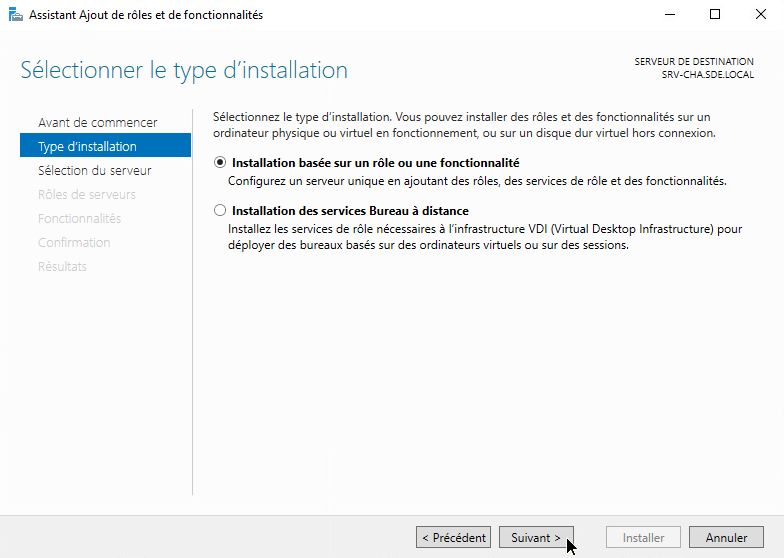
On the installation type page, keep Role-based or feature-based installation then click Next.
Select the file server
Select the destination server
SRV-CHA.SDE.LOCALfrom the server pool, then click Next.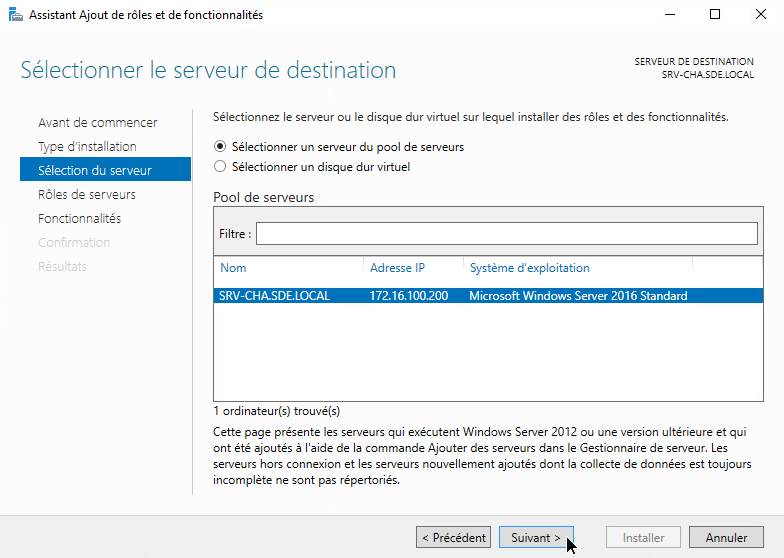
Tick the FSRM role
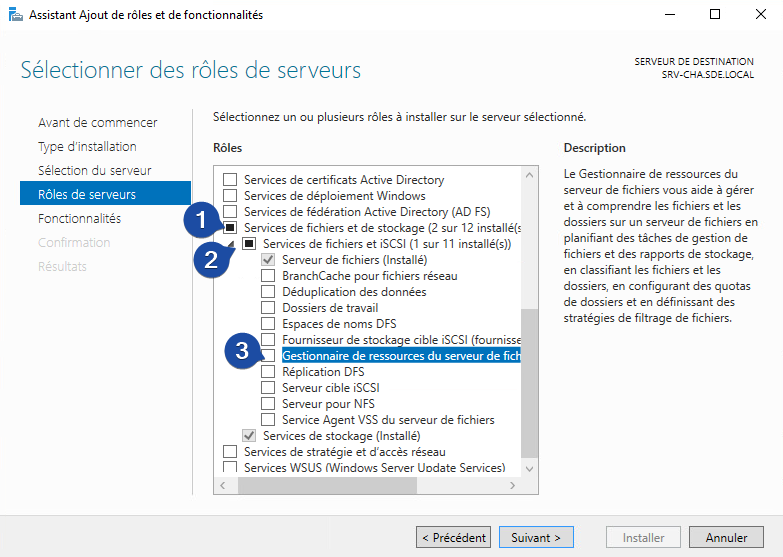
In the roles list, expand File and Storage Services, then File and iSCSI Services, and tick File Server Resource Manager.
Accept the management tools
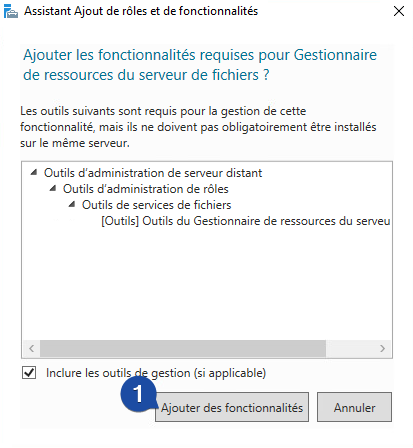
A dialog offers to add the management tools required by the role: confirm with Add Features. Those tools provide the console used in the next steps.
Confirm the selection
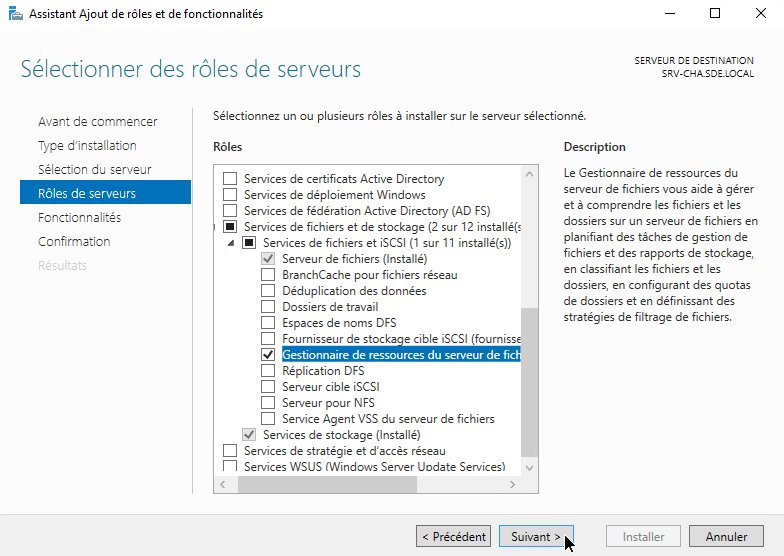
Back on the roles page, File Server Resource Manager is now ticked: click Next.
Add nothing on the features page
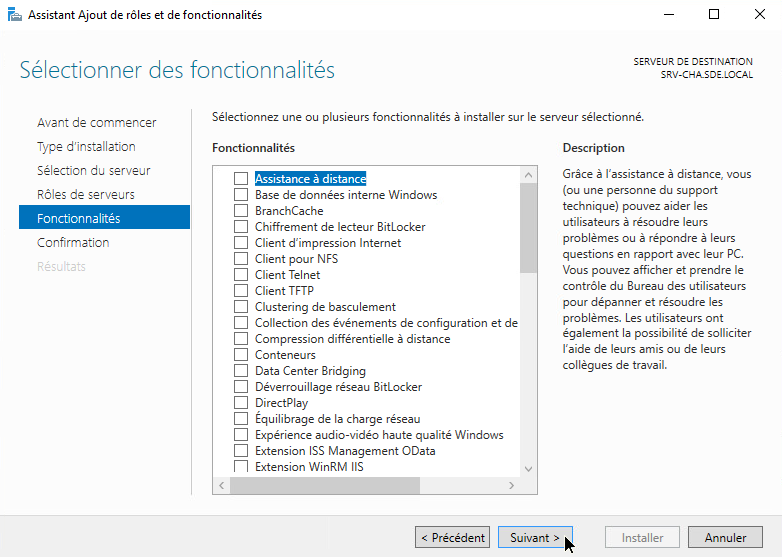
No extra feature is needed here: leave the list untouched and click Next.
Start the installation
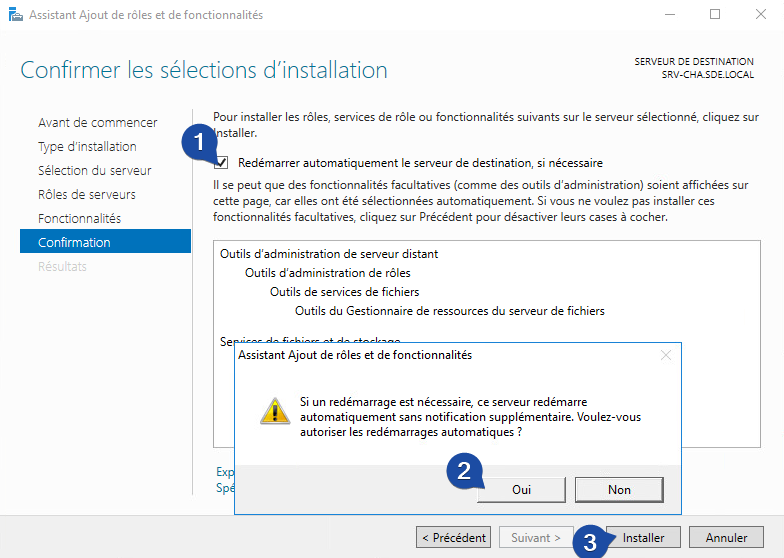
On the confirmation page, allow the automatic restart if needed, accept the warning with Yes, then click Install.
Close the wizard
Once the installation is reported as successful on
SRV-CHA.SDE.LOCAL, click Close to finish.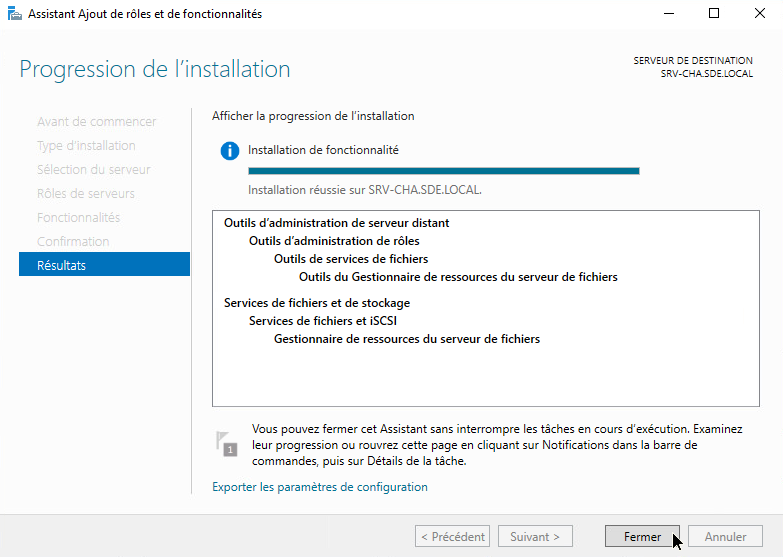
The server can now handle quotas. What remains is deciding how to define them: folder by folder, or once and for all.
Step 2: create a quota template
A quota can be created directly on a folder, with its own settings. That is tempting for the first one and unmanageable by the tenth: every policy change would mean reopening each quota one at a time.
A template flips the logic. You describe a policy once (limit, behaviour, notifications), then each quota derives from it. Editing the template then offers to push the change down to every quota derived from it, in one operation.
Open the FSRM console
In Server Manager, open the Tools menu and launch File Server Resource Manager.
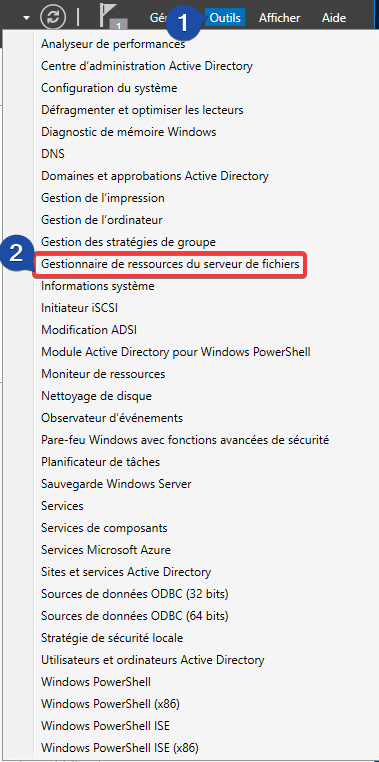
Review the existing templates
Under Quota Management, select Quota Templates to review the built-in templates before creating a new one.
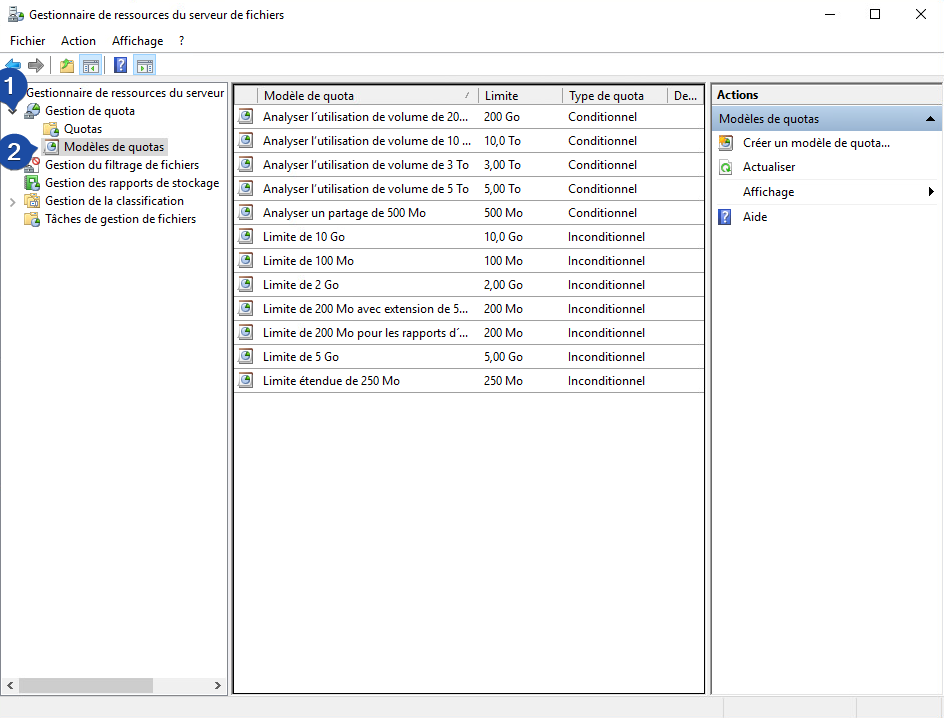
Create a template
Right-click Quota Templates and choose Create Quota Template.
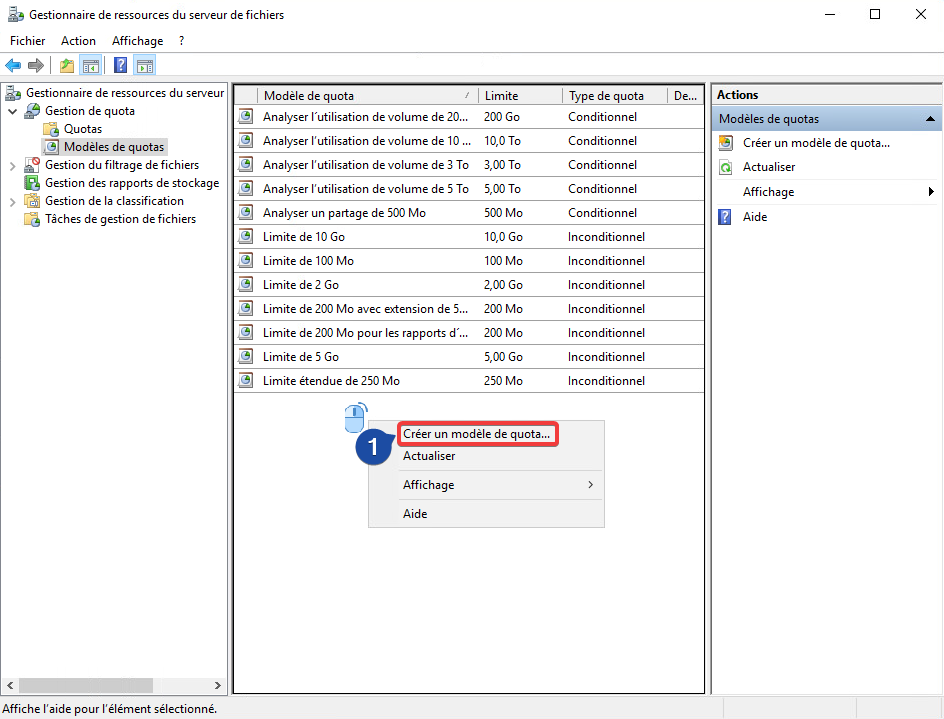
Set the limit and the behaviour
Name the template (here
Limite de 1Go), add a description, set the limit to 1 GB, keep the Hard quota option, then click OK.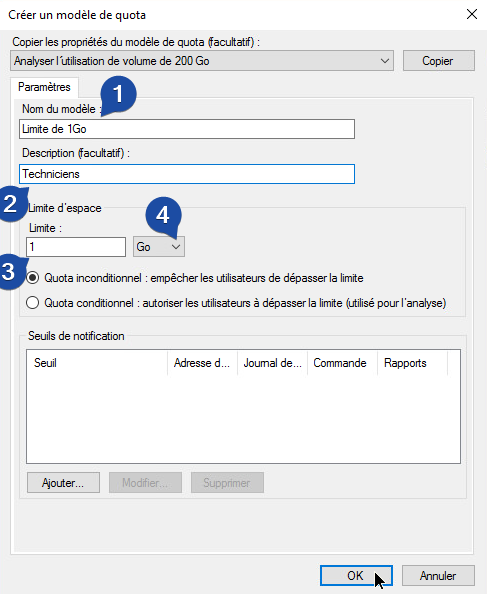
The template exists but applies to nothing yet. It has to be placed on a folder.
Step 3: apply the quota to the folder
Open the quota creation dialog
Under Quota Management, select Quotas then click Create Quota in the Actions pane.
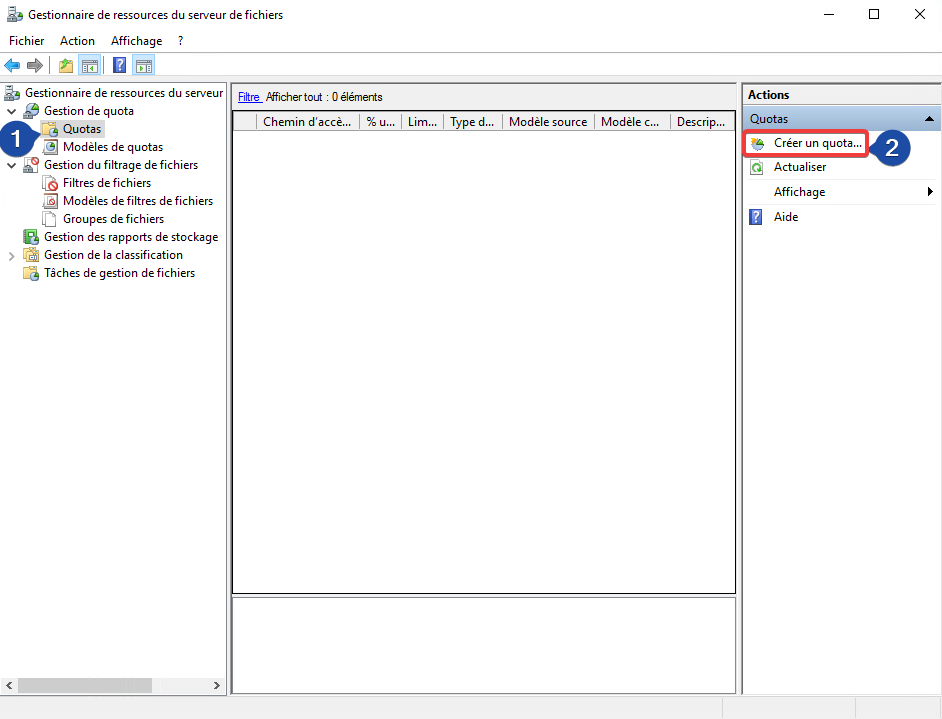
Point at the folder and derive from the template
Browse to the target folder (
Tech-Common), keep the Derive properties from quota templateLimite de 1Gooption, then click Create.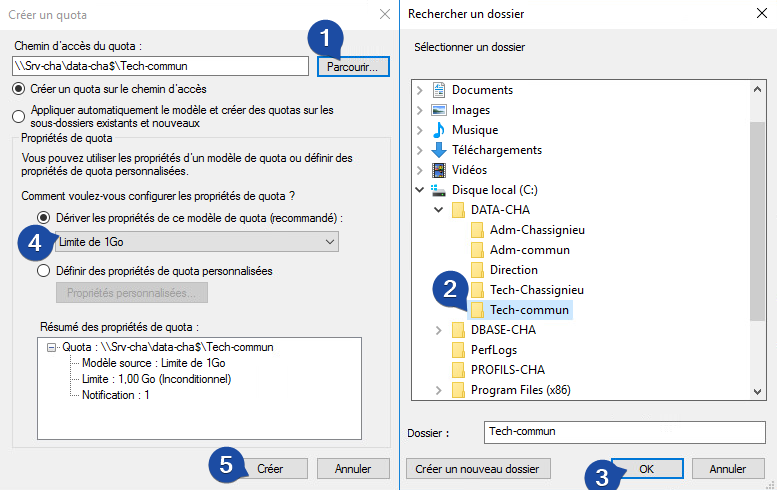
Check the active quota
The new quota appears in the list and shows the 1 GB hard limit applied to the
Tech-Commonfolder.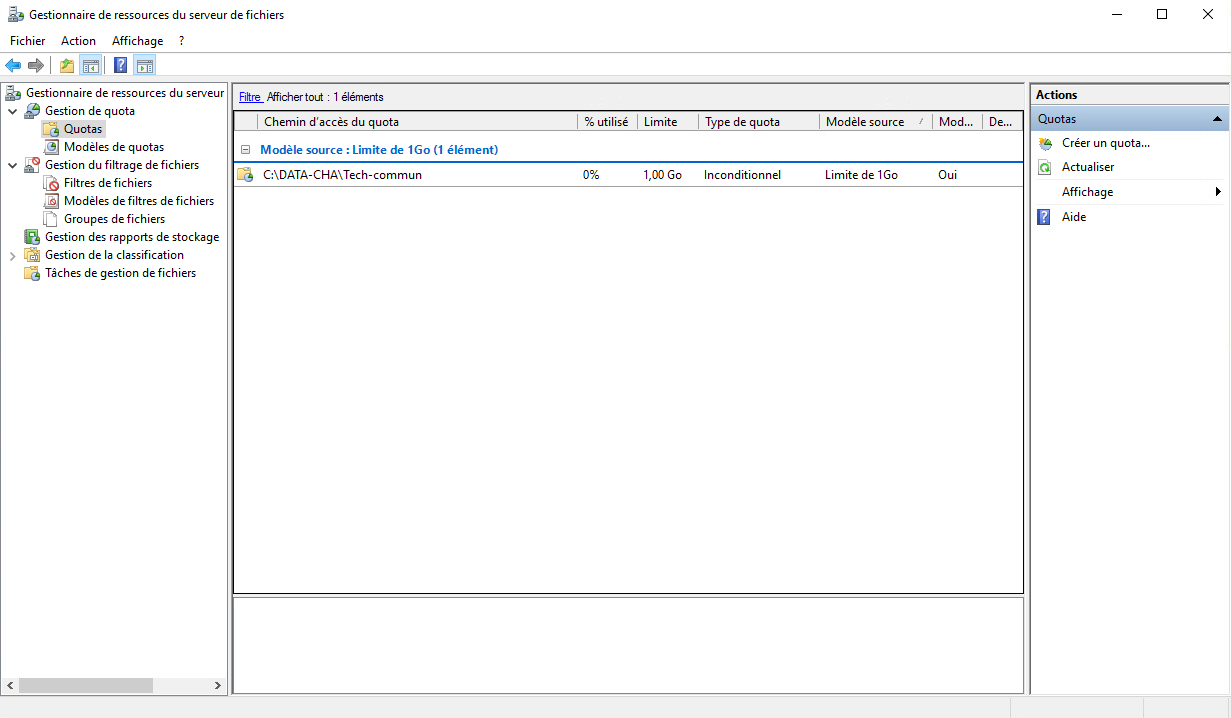
Repeat for every row of the table
Create one template per distinct value (1 GB, 2 GB, 4 GB, 500 MB), then one quota per folder from the requirements table. The last two rows go through an auto quota placed on
PROFILS-CHAandDBASE-CHA.
Volumes are now bounded. One category of abuse remains untouched by quotas: the nature of the files being dropped.
Complete with a file screen
A 4 GB quota filled with project backups and a 4 GB quota filled with movies take exactly the same room on disk. The first is legitimate use, the second is not. A quota measures a volume, it never looks at what is inside: file screening handles that.
Open the file screen creation dialog
Under File Screening Management, select File Screens then click Create File Screen in the Actions pane.
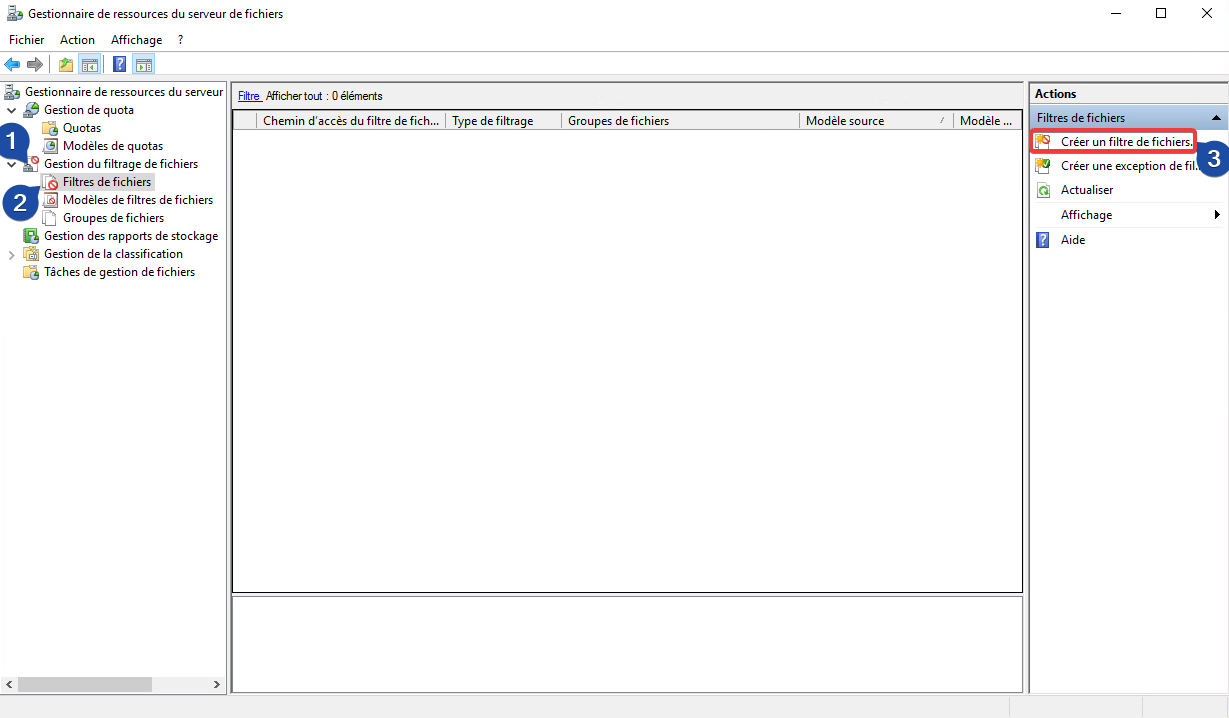
Choose the folder and the type to block
Browse to the
Tech-Commonfolder and derive the screen from theBlock Audio and Video Filestemplate, then click Create.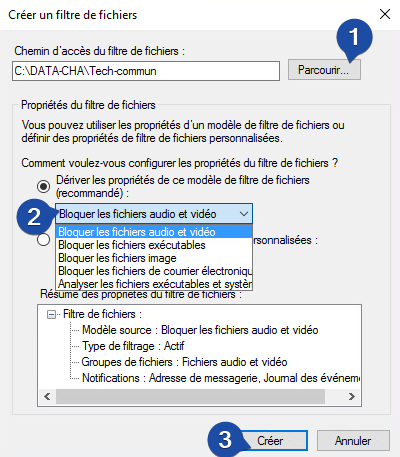
Check the active screen
The file screen now appears in the list and blocks audio and video files in the
Tech-Commonfolder.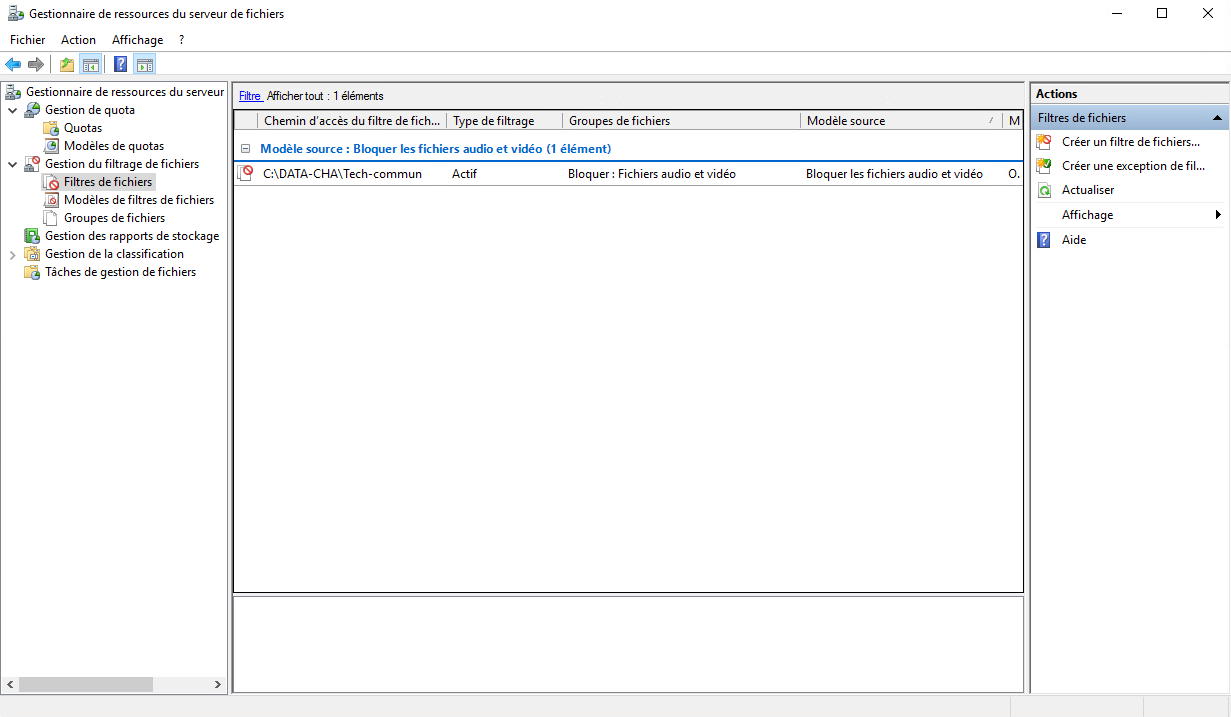
Verify and recap
The best test is still filling a folder from a client machine, with a domain account, until the limit is crossed.
| To check | Expected result | What it validates |
|---|---|---|
| Copy files past the limit | insufficient disk space error | hard quota is active |
| Usage column in the Quotas console | the percentage follows the copy | the quota watches the right folder |
Copy an .mp4 file into Tech-Common | copy refused | file screen is active |
| Create an account then open its session | its home folder gets 500 MB | auto quota on DBASE-CHA |
| Change the template limit | offer to push down to derived quotas | the derivation link is in place |
The series is complete. The first article built the domain controller, the second organised the directory and compartmentalised the shares along the AGDLP model, and this one bounded what each share can consume. Three questions, three answers: who exists, who reaches what, and how much each one can occupy.